Set PIN Widget
Using this widget you can add set pin to your website. It requires a Synctera widget vault token to
initialize it with. The user will have 5 minutes to complete the pin submission.
The Set Pin Widget injects a configurable set of iframes into your app, allowing your user to
securely enter a PIN in a PCI compliant manner. This helps remove some (but not all) of the PCI
compliance requirements you would otherwise need to handle.
The iframes injected by Synctera allow you complete control over the styling over the widget using
only CSS.
Quick start
- Add
<script src="https://widgets-sandbox.synctera.com/assets/set-pin/v1/loader.js"></script>
to your page. - Embed the Set Pin widgets when and as needed (both the Controller and Confirm Set Pin widgets are
needed):<!-- Controller widget: --> <set-pin id="synctera-set-pin" token="[insert the token here]"></set-pin> <!-- Confirm widget: --> <set-pin isConfirm></set-pin> - Add your own submit button under the Set Pin widgets.
- Listen for the
validityevent on the Controller Set Pin widget (the one with the id):const setPinWidget = document.getElementById('synctera-set-pin'); setPinWidget.onValidity = (e, isValid) => button.disabled = !isValid; - Have the button call
setPinWidget.submit()to submit the pin.
It returns a promise, which
resolves if the pin submission was successful, or rejects if it failed.
Basic Example:
<html>
<head>
<script src="https://widgets-sandbox.synctera.com/assets/set-pin/v1/loader.js"></script>
</head>
<body>
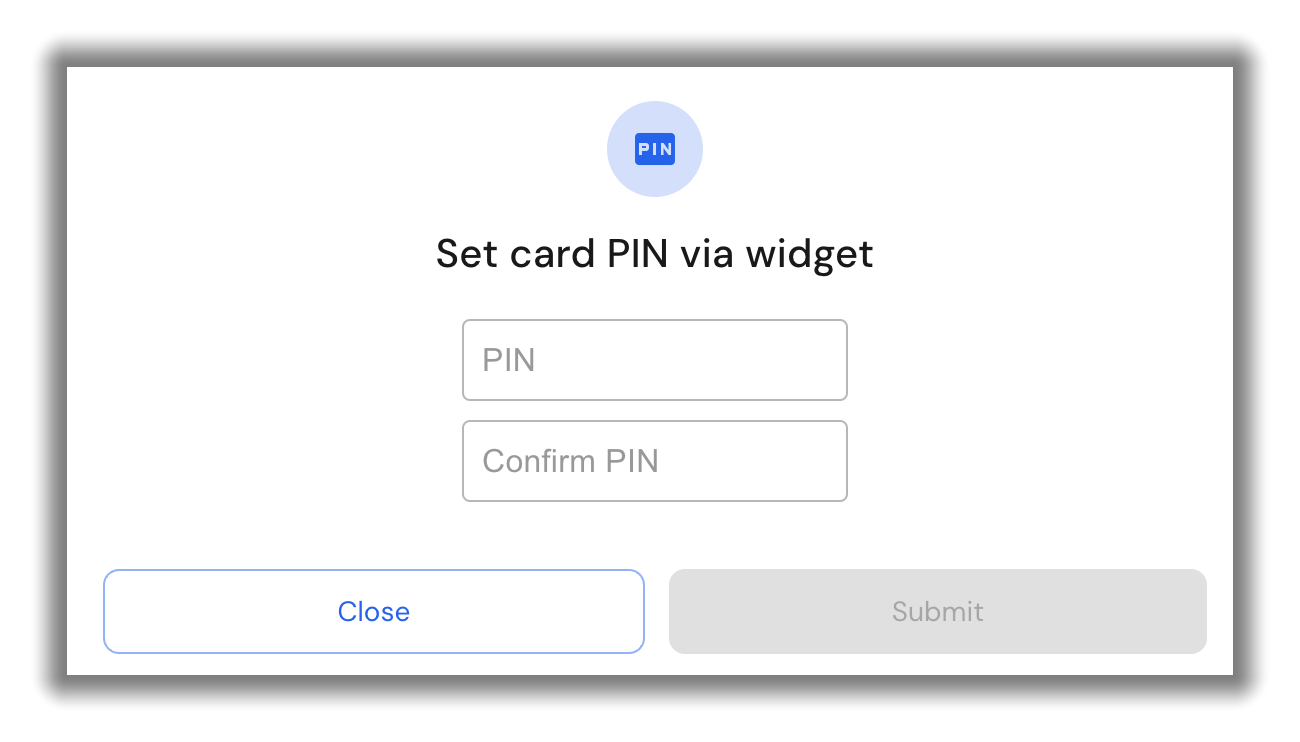
<div>PIN</div>
<set-pin id="synctera-set-pin" token="[insert the token here]"></set-pin>
<div>Confirm PIN</div>
<set-pin isConfirm></set-pin>
<button id="synctera-submit-button" disabled>Submit</button>
<script type="application/javascript">
const setPin = document.getElementById('synctera-set-pin');
const button = document.getElementById('synctera-submit-button');
setPin.addEventListener('validity', () => button.disabled = !setPin.isValid);
button.addEventListener('click', () => {
setPin.submit()
.then(() => alert('Pin set!'))
.catch((e) => console.error('Pin failed to submit', e));
});
</script>
</body>
</html>
Styling: If you add a custom class name to the Set Pin widget, custom styling will be activated
(see Custom Styling). By default, the widgets use the browser's inbuilt
styling for the Set Pin input text fields (note that without custom styling the widget iframe is
4px bigger than the input field inside to allow for any browser outline effects).
See Custom Styling Example for a complete working example.
Environments
- Sandbox: https://widgets-sandbox.synctera.com/assets/set-pin/v1/loader.js
- Production: https://widgets.synctera.com/assets/set-pin/v1/loader.js
Browser support
The widgets work on both mobile and desktop, and we ensure support for all modern browsers. It also
works in many older browsers, which we try to support where feasible.
| Browser | Minimum tested version |
|---|---|
| Chrome | 29 (2013) |
| Firefox | 27 (2014) |
| Edge | 79 (2020), 15 (2017) |
| Safari | 12 (2018) |
| Opera | 20 (2014) |
| IE | 11 (2013) |
Set Pin flow
Summary
Fetch widget token from backend → Render widgets with token → Listen for "validity" event → User
submits controller widget → Widget submits PIN to Synctera → And returns success or failure →
Widget auto-destroys
Note: It is recommended to also add 'load' and 'error' listeners for UI management
(see Widget API below).
The flow for using the widgets:
- On your backend, request a widget token from Synctera for the particular card you wish to use.
- Make sure the Synctera Set Pin widget Javascript has been added to your website.
- Render the two specialized Set Pin HTML tags as above, setting the token attribute, and your own
button to submit the widget. - You can style these fields however you like (as explained below in Custom Styling).
- Listen for the "validity" event from the controller widget.
- When valid, enable your button.
- When the button is clicked, call the
submit()function on the controller widget. - The submit function will submit the pin.
- It also returns a promise which resolves when successful, or rejects when there's a failure.
- Once submitted, the widgets will auto-destroy and you can now remove them.
Widget API
Element Attributes:
| Name | Value | Default | Details | Example |
|---|---|---|---|---|
| token | widget token ID | - | Required Incompatible with: isConfirm | <set-pin token="[widget token from Synctera]" ...> |
| isConfirm | true (Present) false (Omitted) | Omitted | Required Incompatible with: token | <set-pin token="[widget token from Synctera]" ...><set-pin isConfirm></set-pin> |
| class | class name (string) | Omitted | Optional If present, it will activate custom styling | <set-pin ... class="customStyles" ...> |
Events:
| Name | Called when... | Why? | addEventListener | on |
|---|---|---|---|---|
| load | The widgets have are fully loaded | For best user experience, show the widgets only when this event is triggered | setPinEl.addEventListener('load', () => ...); | setPinEl.onLoad = () => ... |
| validity | The widgets are now (in)valid | Only allow submit() to be called when validTo get the status, check the "isValid" property | setPinEl.addEventListener('validity', () => {␠ buttonEl.disabled = !setPinEl.isValid;}); | setPinEl.onValidity = (e, isValid) => {␠ buttonEl.disabled = !isValid;}; |
| error | The widgets failed to load | Non-recoverable error states To get the error, check the "error" property | setPinEl.addEventListener('error', () => {␠ console.log(setPinEl.error);}); | setPinEl.onError = () => {␠ console.log(setPinEl.error);}; |
| success | The widget submitted successfully | Know when the widget is done and the pin was saved Alternatively: The "submit()" method returns a promise resolving when done | setPinEl.addEventListener('success', () => ...); | setPinEl.onSuccess = () => ... |
| failure | The widget submitted unsuccessfully | Know if the pin was not saved and the user will need to try again Alternatively: The "submit()" method returns a promise rejecting on failure To get the failure, check the "error" property | setPinEl.addEventListener('failure', () => {␠ console.log(setPinEl.error);}); | setPinEl.onFailure = (e, errorDetails) => ... |
Fields:
| Name | Value / Parameters | Default / Returns | Details | Example |
|---|---|---|---|---|
| isValid | true false | false | true if both fields are valid and form is ready to submit | setPinEl.isValid |
| error | { errorType:'...', error: * } | undefined | Error details if an error or failure occurs | setPinEl.error |
| submit() | No parameters | Returns: Promise | Submits the PIN to Sycntera's servers Alternatively: The widget fires "success" and "failure" events | setPinEl.submit()␠ .then(// success)␠ .catch(// error) |
Custom styling
Summary
- Add a class name to
set-pintags to activate Custom Styling:<set-pin class='customStyles' ...- Style as desired (i.e. border), but Font Styles are special
- For pseudo-selectors, e.g.
:hover,:focus, etc - use pseudo-attributes instead:
Example:.customStyles[_hover] { border: 1px solid #616161; }- Font styles are auto-forwarded, but only certain values are allowed (see below)
- Optional: You can use
.customStyles[_required]to show the widgets once they have loaded
By default, without custom styling, the widgets use the browser's inbuilt styling for the Set Pin
input text fields (note that the widget iframe is 4px bigger than the input field inside to allow
for any browser outline effects).
You may want to style the widget to match your webapp design or to add things like placeholders.
This can be done entirely through css styling. When a class attribute is added to the widget,
the 4px spacing is removed, the input box styling is stripped and the background is made transparent
such that any elements placed behind the widget will be visible (i.e. a placeholder element). The
text input is set to always take up 100% of the height and width of the iframe, and likewise for the
iframe in the widget tag.
Input text field pseudo selectors such as :hover, :focus and :blank are indirectly supported
through css-like attributes instead of actual pseudo selectors. As the user hovers, focuses and
types in the field, attributes will be added/removed on the set-pin tag automatically. Supported
"pseudo attributes" are inspired from: https://developer.mozilla.org/en-US/docs/Web/CSS/Pseudo-classes#input_pseudo-classes
Where customStyles is the class name added to widget tags, e.g. <set-pin class='customStyles'...:
| Supported selector | Input field equivalent | Description |
|---|---|---|
| .customStyles[_required] | input:required | True as soon as the widget has rendered (Useful to know when the widget is ready to be shown) |
| .customStyles[_hover] | input:hover | True when the field is hovered over by the mouse |
| .customStyles[_focus] | input:focus | True when the field is focused |
| .customStyles[_active] | input:active | True when the mouse or touch is pressing down on the field |
| .customStyles[_blank] | input:blank | True when there is no text in the field |
| .customStyles[_invalid] | input:invalid | True when the text in the field is not yet valid |
| .customStyles[_valid] | input:valid | True when the text in the field is now valid. For confirm, also only if matching controller |
| .customStyles[_user-invalid] | input:user-invalid | Like :invalid, but only after the user first interacted with the field |
| .customStyles[_user-valid] | input:user-valid | Like :valid, but only after the user first interacted with the field |
| .customStyles[_out-of-range] | input:out-of-range | True when the text in the field is less than four numbers |
| .customStyles[_in-range] | input:in-range | True when the text in the field is now four numbers |
Note that for the confirm widget, the invalid and valid are dependent upon the value matching
the controller widget's value. However, out-of-range and in-range are not.
See Font Styles for information on acceptable font style values.
src="https://widgets-sandbox.synctera.com/assets/set-pin/v1/loader.js"
Custom Styling Example:
<html>
   <head>
      <script
         type="application/javascript"
         src="https://widgets-sandbox.synctera.com/assets/set-pin/v1/loader.js"
      ></script>

      <style>
         .ct {
            /* Setting the container to relative allows us to control the placement of absolutely positioned children */
            position: relative;
            margin: 5px;
         }

         .customStyles {
            /* Set on the widget <set-pin> tag */
            box-sizing: border-box;
            border: 1px solid #b7b7b7;
            width: 193px;
            height: 41px;
            border-radius: 4px;
            padding: 0 8px;
         }

         /* Rather than using pseudo selectors (e.g. .customStyles:hover), a "pseudo attribute" is
          * added to the set-pin tag, you can select using attribute selectors like this */
         .customStyles[_hover] {
            border: 1px solid #616161;
         }
         .customStyles[_focus] {
            border: 2px solid #2564eb;
            padding: 0 7px;
         }
         .customStyles[_disabled] {
            background: #d3d3d3;
         }
         .customStyles[_user-invalid] {
            border-color: #e31b0c;
         }

         .customStyles,
         .pin-placeholder {
            /* These fonts will automatically be sent to the iframe (after sanitization) */
            font-family: Arial, sans-serif;
            font-size: 1rem;
            line-height: 1.4375em;
            font-weight: 400;
            color: rgba(0, 0, 0, 0.87);
            letter-spacing: 0.15px;
         }

         .pin-placeholder {
            /* You can absolutely position a placeholder behind the set-pin tag */
            position: absolute;
            display: none;
            top: 9px;
            left: 10px;
            color: rgba(0, 0, 0, 0.4);
            z-index: -1;
         }

         .customStyles[_blank] + .pin-placeholder {
            /* This will show the placeholder if the field is blank */
            display: block;
         }
         .customStyles[_focus] + .pin-placeholder {
            /* But hide the placeholder again when the set-pin tag indicates it has focus */
            display: none;
         }

         /* Hide the container until the component is ready to show */
         .ct:has(.customStyles:not([_required])) {
            display: none;
         }
      </style>
   </head>
   <body>
      <!-- Remove "customStyles" to see default styling -->
      <div class="ct">
         <set-pin id="synctera-set-pin" class="customStyles" token="[insert the token here]"></set-pin>
         <div class="pin-placeholder">PIN</div>
      </div>
      <div class="ct">
         <set-pin class="customStyles" isconfirm></set-pin>
         <div class="pin-placeholder">Confirm PIN</div>
      </div>
      <div class="ct">
         <button id="synctera-submit-button" disabled="">Submit</button>
      </div>

      <script>
         var setPin = document.getElementById('synctera-set-pin');
         var button = document.getElementById('synctera-submit-button');

         setPin.addEventListener('load', () => console.log('LOADED'));

         setPin.addEventListener('validity', () => button.disabled = !setPin.isValid);

         button.addEventListener('click', () => {
            setPin.submit()
               .then(() => alert('Pin set!'))
               .catch((e) => console.error('Pin failed to submit', e));
         });
      </script>
   </body>
</html>
Font Styles
You can style the tag as you see fit (border, background, etc). Css font properties
are handled in a special way to forward them to the iframe for styling the input, in a secure and
sanitized manner. As such only certain css font properties are supported and only with certain
values (all other values may be ignored, if they work they are not guaranteed across all browsers):
| Font css property name | Allowed values |
|---|---|
| color | rgb(<R>, <G>, <B>) or rgba(<R>, <G>, <B>, <Alpha>) |
| font-family | One of: courier: Courier New, Courier, Lucida Console, Lucida Sans Typewriter, monospacearial: Arial, Helvetica, sans-serifgeorgia: Georgia, Times New Roman, Times, serifhelvetica: Helvetica, Arial, sans-seriflucida: Lucida Console, Lucida Sans Typewriter, Courier New, Courier, monospacetimes: Times New Roman, Times, Georgia, seriftahoma: Tahoma, Verdana, sans-serifverdana: Verdana, Tahoma, sans-serif |
| font-size | <N>px |
| font-weight | <N>00 (a number, not 'bold' etc) |
| line-height | <N>px |
| letter-spacing | <N>px |
Note that with the font-family property, we look for a keyword in the first font in the comma
seperated list of fonts you supply. If there's a match, we use the font-family strings in the above
table and not the font-family specified (for security). The above list of fonts are designed to
ensure maximum coverage across different operating systems for similar style fonts. Custom fonts are
not supported at this time.
Typescript type files
The following type definitions are available for Set Pin:
Additional Resources
For examples showing the Card Activation & Set PIN widget implementation please see the following:
Updated 6 months ago